The Product Catalogue in the social.plus Console allows administrators to manage a centralized product database. Products added here can be tagged in community content such as posts, comments, and stories — enabling social commerce experiences and product discovery within your application.
Product Listing
View, search, and filter all products in a comprehensive table view
Add Products
Create individual products with details, pricing, images, and URLs
Bulk Import
Import multiple products at once via CSV file upload
Bulk Update
Update existing product details in bulk using CSV files
Status Management
Control product visibility with Active and Archived statuses
Product Tagging
Enable products to be tagged in community content for social commerce
Overview
The Product Catalogue provides a centralized dashboard for uploading, managing, and previewing products that can be tagged in community content. This enables social commerce workflows where users can discover and engage with products directly within posts, comments, and stories.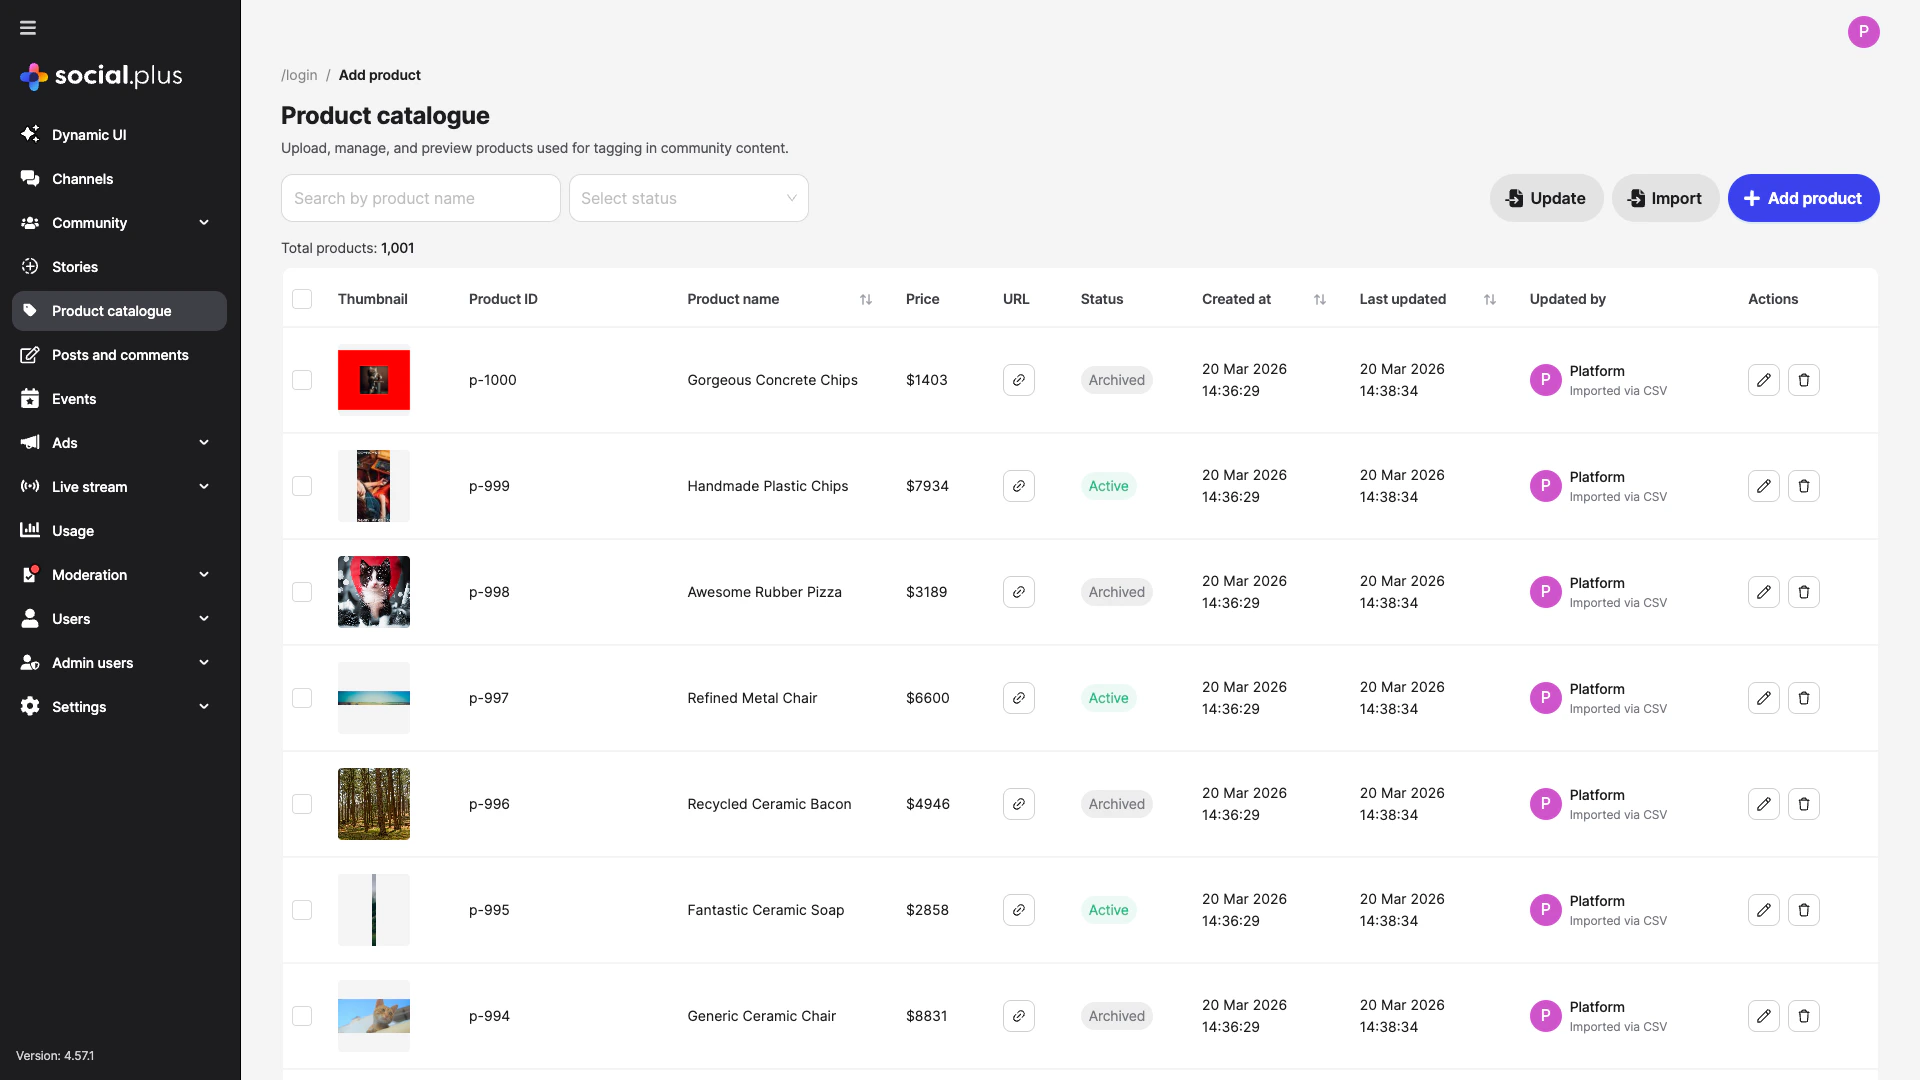
| Column | Description |
|---|---|
| Thumbnail | Product image preview |
| Product ID | Unique alphanumeric identifier for the product |
| Product name | Display name shown when the product is tagged in content |
| Price | Product price with currency |
| URL | Link to the product page |
| Status | Current status — Active or Archived |
| Created at | Timestamp of product creation |
| Last updated | Timestamp of the most recent update |
| Updated by | The admin user who last modified the product |
| Actions | Edit or delete the product |
Quick Start
Access Product Catalogue
Navigate to Product catalogue in the left sidebar of your social.plus Console
Add Your First Product
Click + Add product to create a product with an ID, name, URL, price, and thumbnail image
Adding a Product
Click the + Add product button in the top-right corner to create a new product entry.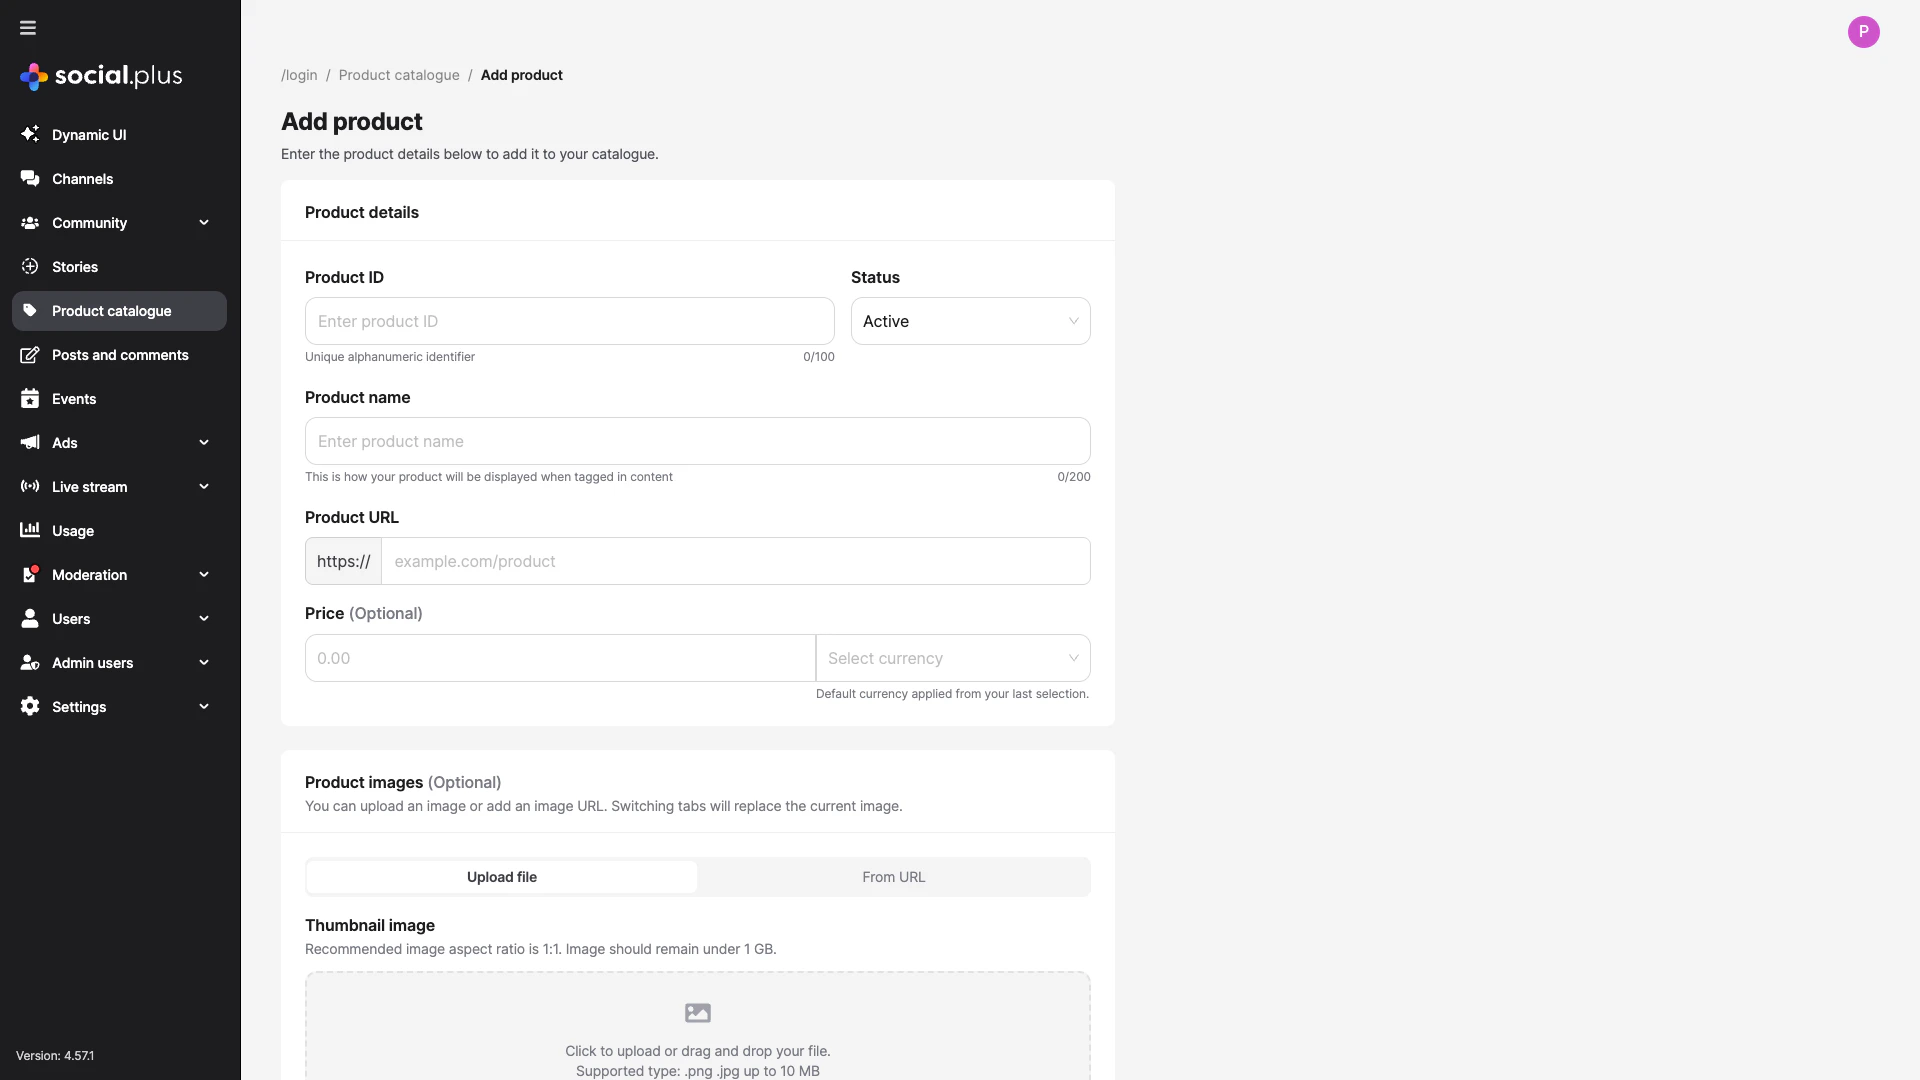
Product Details
Product ID
Product ID
Required — A unique alphanumeric identifier for the product (max 100 characters). This ID cannot be changed after creation.Example:
SKU-12345, prod-widget-blueStatus
Status
Required — Controls product visibility for content tagging:
- Active: Product is available for tagging in community content
- Archived: Product is hidden from content tagging but retained in the catalogue
Product Name
Product Name
Required — The display name shown when the product is tagged in content (max 200 characters). Choose a clear, recognizable name for your users.
Product URL
Product URL
Required — The URL linking to the product page. The
https:// prefix is automatically applied.Example: example.com/products/widget-bluePrice
Price
Optional — The product price with a selectable currency. The default currency is remembered from your last selection.
Product Images
Product Images
Optional — A thumbnail image for the product. You can either:
- Upload a file: Drag and drop or click to upload (
.png,.jpg, up to 10 MB) - Add from URL: Provide a direct URL to the product image
Editing a Product
Click the edit icon (pencil) in the Actions column of any product row to modify its details.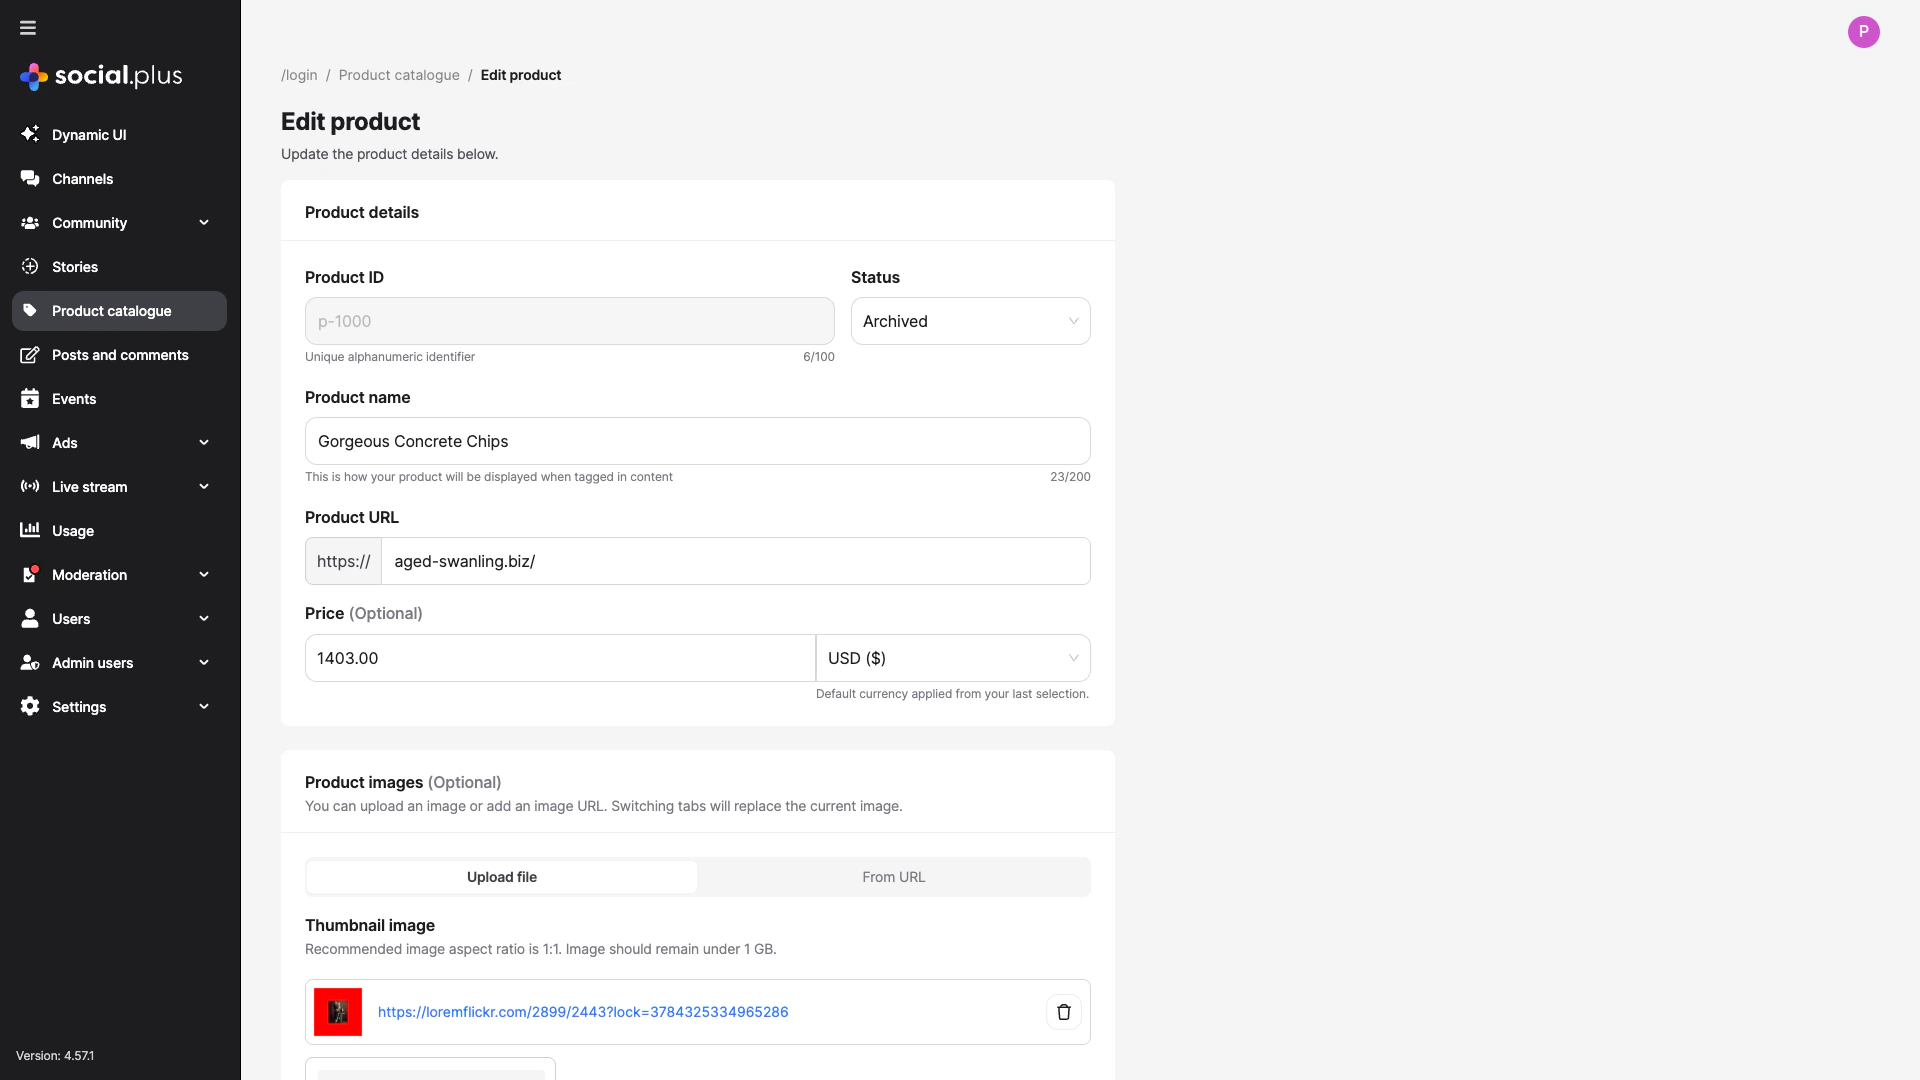
- Product ID is read-only and cannot be changed after creation
- All other fields (name, URL, price, status, images) can be updated
- Click Save changes to apply your modifications
Importing Products via CSV
Click the Import button to bulk-create products from a CSV file.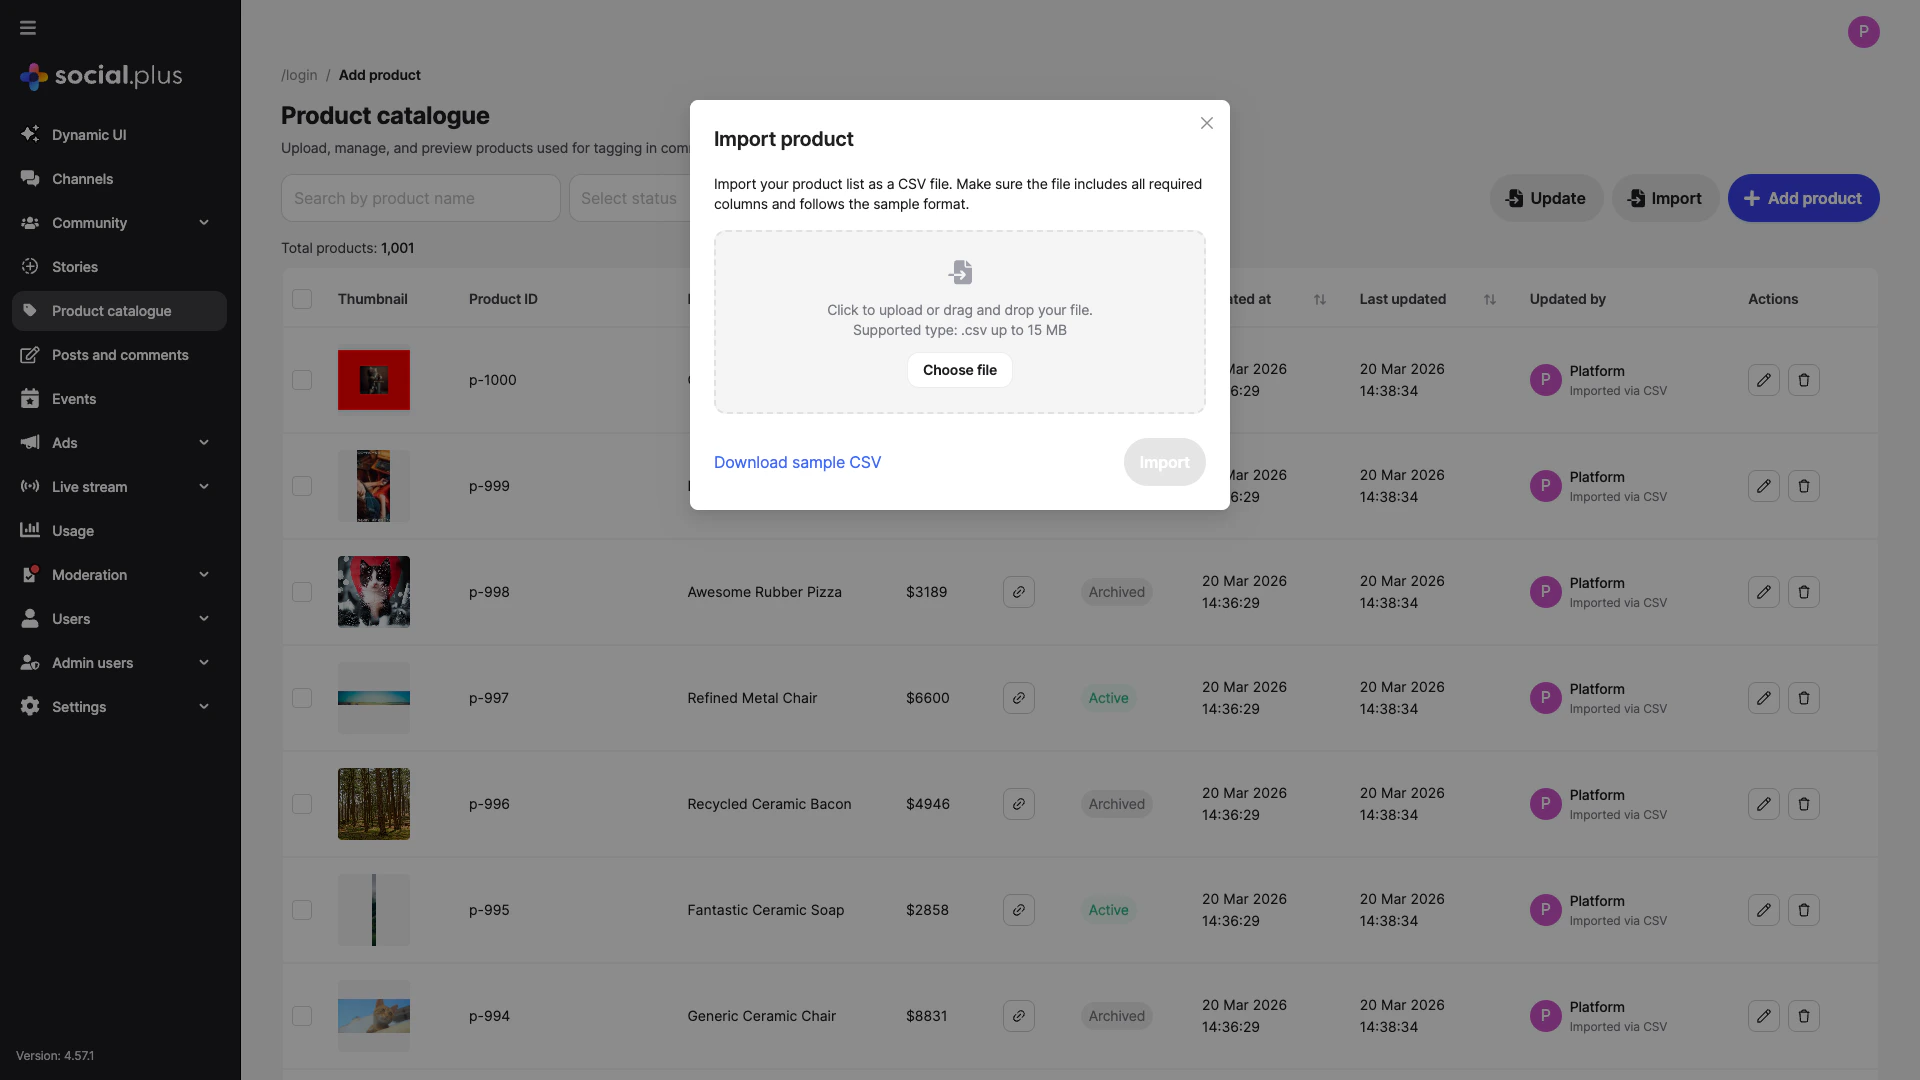
Prepare Your CSV File
Fill in the CSV with your product data. Ensure all required columns are included and the file follows the sample format
Upload the File
Drag and drop your
.csv file into the upload area, or click Choose file to browse. Maximum file size is 15 MBThe import function creates new products in your catalogue. Each row in the CSV should contain a unique product ID that does not already exist in the catalogue.
Updating Products via CSV
Click the Update button to bulk-update existing products from a CSV file.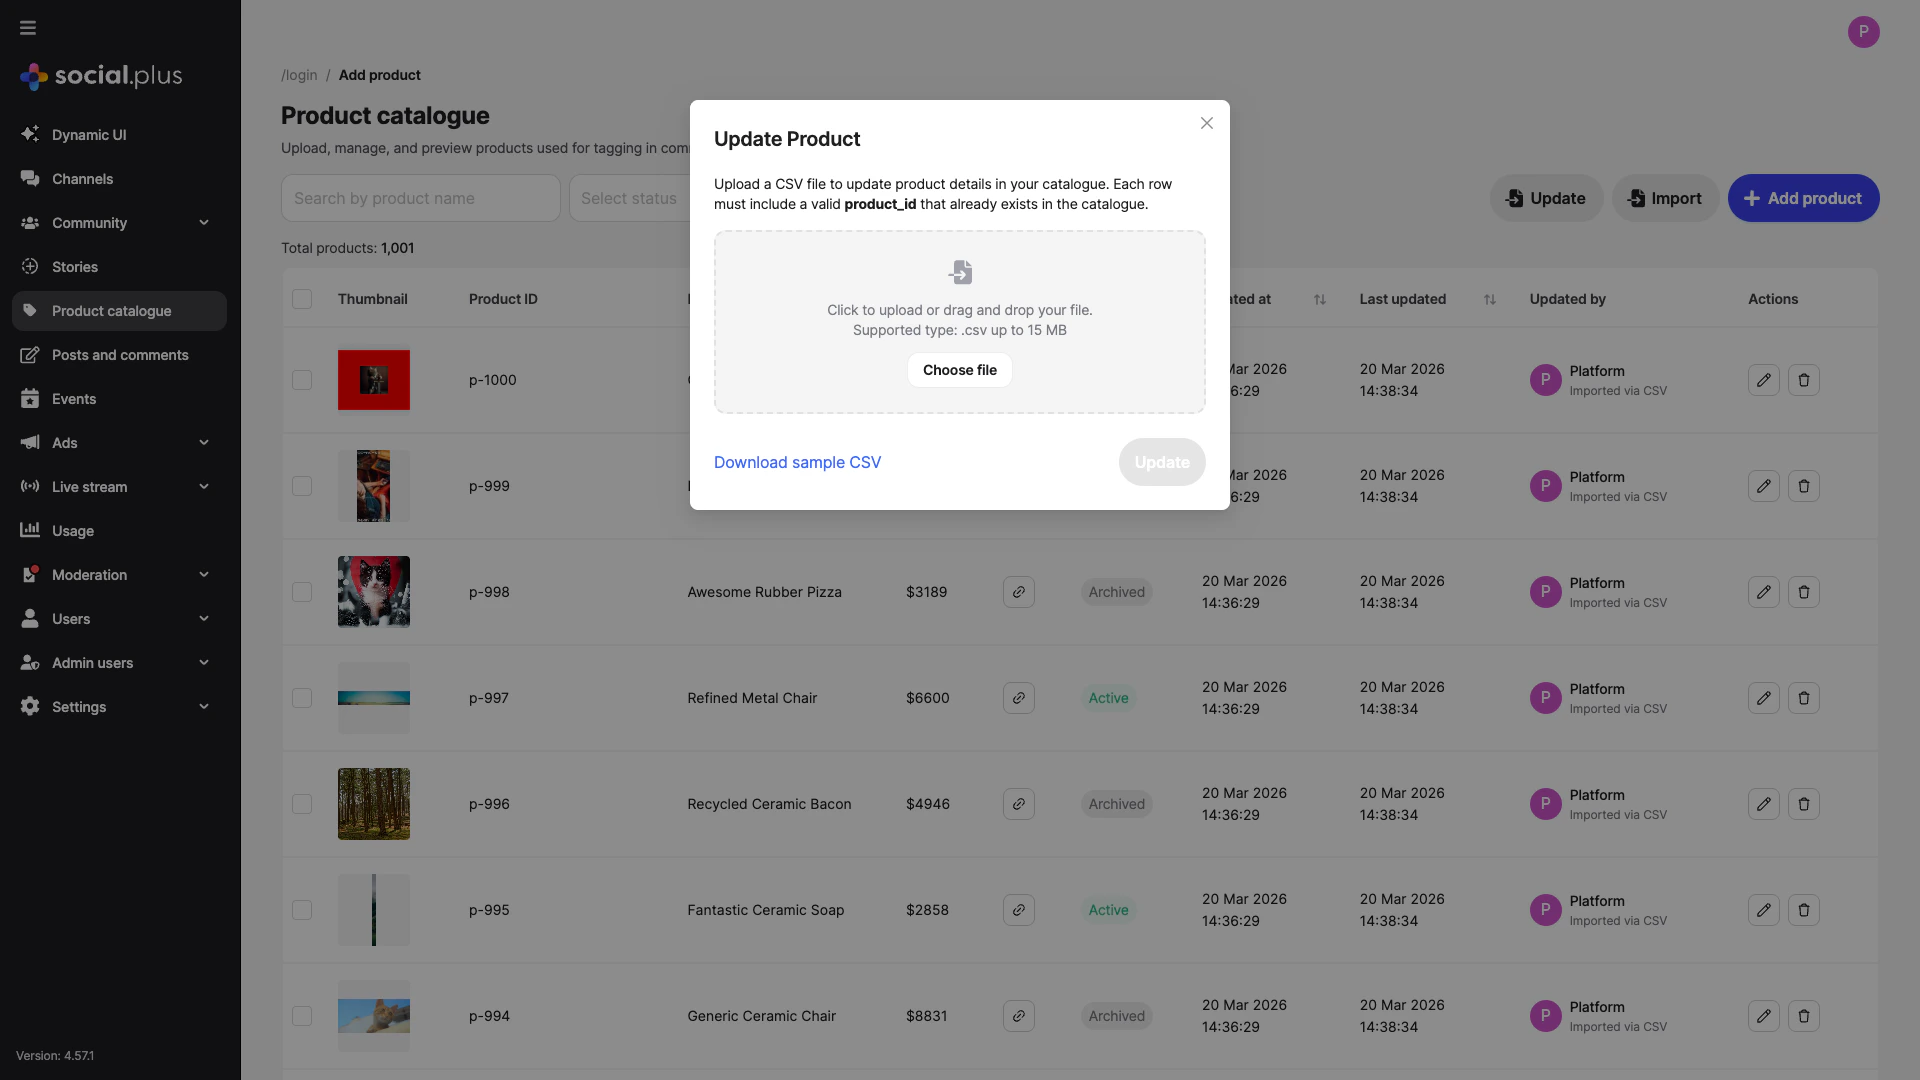
Deleting Products
Click the delete icon (trash) in the Actions column to remove a product from the catalogue. You can also select multiple products using the checkboxes in the leftmost column for batch operations.Product Tagging in Posts
You can tag products from the Product Catalogue directly in post content by typing@ followed by the product name, then switching to the Tag product tab in the dropdown. Tagged products appear as interactive links in the post and display with thumbnails and pricing below the content.
For the full product tagging workflow, screenshots, and guidelines, see Tagging Products in Posts in the Post Management documentation.
Filtering and Searching
The Product Catalogue provides several ways to find specific products:| Feature | Description |
|---|---|
| Search by name | Type in the search field to filter products by product name |
| Filter by status | Use the status dropdown to show only Active or Archived products |
| Sort by column | Click sortable column headers (Product name, Created at, Last updated) to reorder the list |
Best Practices
Product ID Conventions
Product ID Conventions
- Use a consistent naming scheme for product IDs (e.g.,
SKU-001,prod-category-name) - Product IDs cannot be changed after creation, so plan your ID structure carefully
- Keep IDs alphanumeric and under 100 characters
Bulk Operations
Bulk Operations
- Use the Import feature for initial catalogue setup with many products
- Use the Update feature for ongoing maintenance and price/status changes
- Always download and review the sample CSV before preparing your data
- Validate your CSV before uploading to minimize errors
Image Guidelines
Image Guidelines
- Use a 1:1 aspect ratio for consistent thumbnail display
- Keep images under 10 MB for file uploads
- Use high-quality images that clearly represent the product
- Provide image URLs from reliable, fast-loading CDNs when using the URL method
Status Management
Status Management
- Set seasonal or discontinued products to Archived rather than deleting them
- Use the status filter to quickly audit active vs. archived products
- Archived products are retained in the catalogue but hidden from content tagging
Related Topics
Social Management
Manage communities where products can be tagged in content
Events Management
Create and manage events alongside product promotions
Console Overview
Learn about all Console features and administration capabilities